

I do really enjoy making my own flowers and embellishments for projects, so I thought I would share with you how I have made flowers using Verday paint, and some mulberry paper ( yes I too have a mountain of this) The Verday paint works really well on mulberry paper as the paper is porous, so it soaks into it, which gives a lovely patina finish.
Step 1
I cut my shapes using a flower die, but if you don't have a die cutter just cut them by hand. You need 3 shapes for each flower.

Step 2
Now cut them as shown in the picture.

Step 3
Glue them together using a glue like glossy accents or Mod Podge. Snip the bottoms of all of them except the smallest one. Now using something small and round, the end of a paint brush is good for this, curl the petals under. Your shapes will now look like this.

Step 4
Start with the small center one that has not had its bottom bit cut off, put some glossy accents onto the point and twist it, so it is quite stiff, now start to layer your flowers up. Put the point through the cut center of the next smallest, pushing it down well into the center. Add some more accents to the bottom rim of the flower and layer the next piece onto the bottom, placing it so the petals are spaced around the flower, carry on with the remaining flower shapes until you flower ends up looking like this.

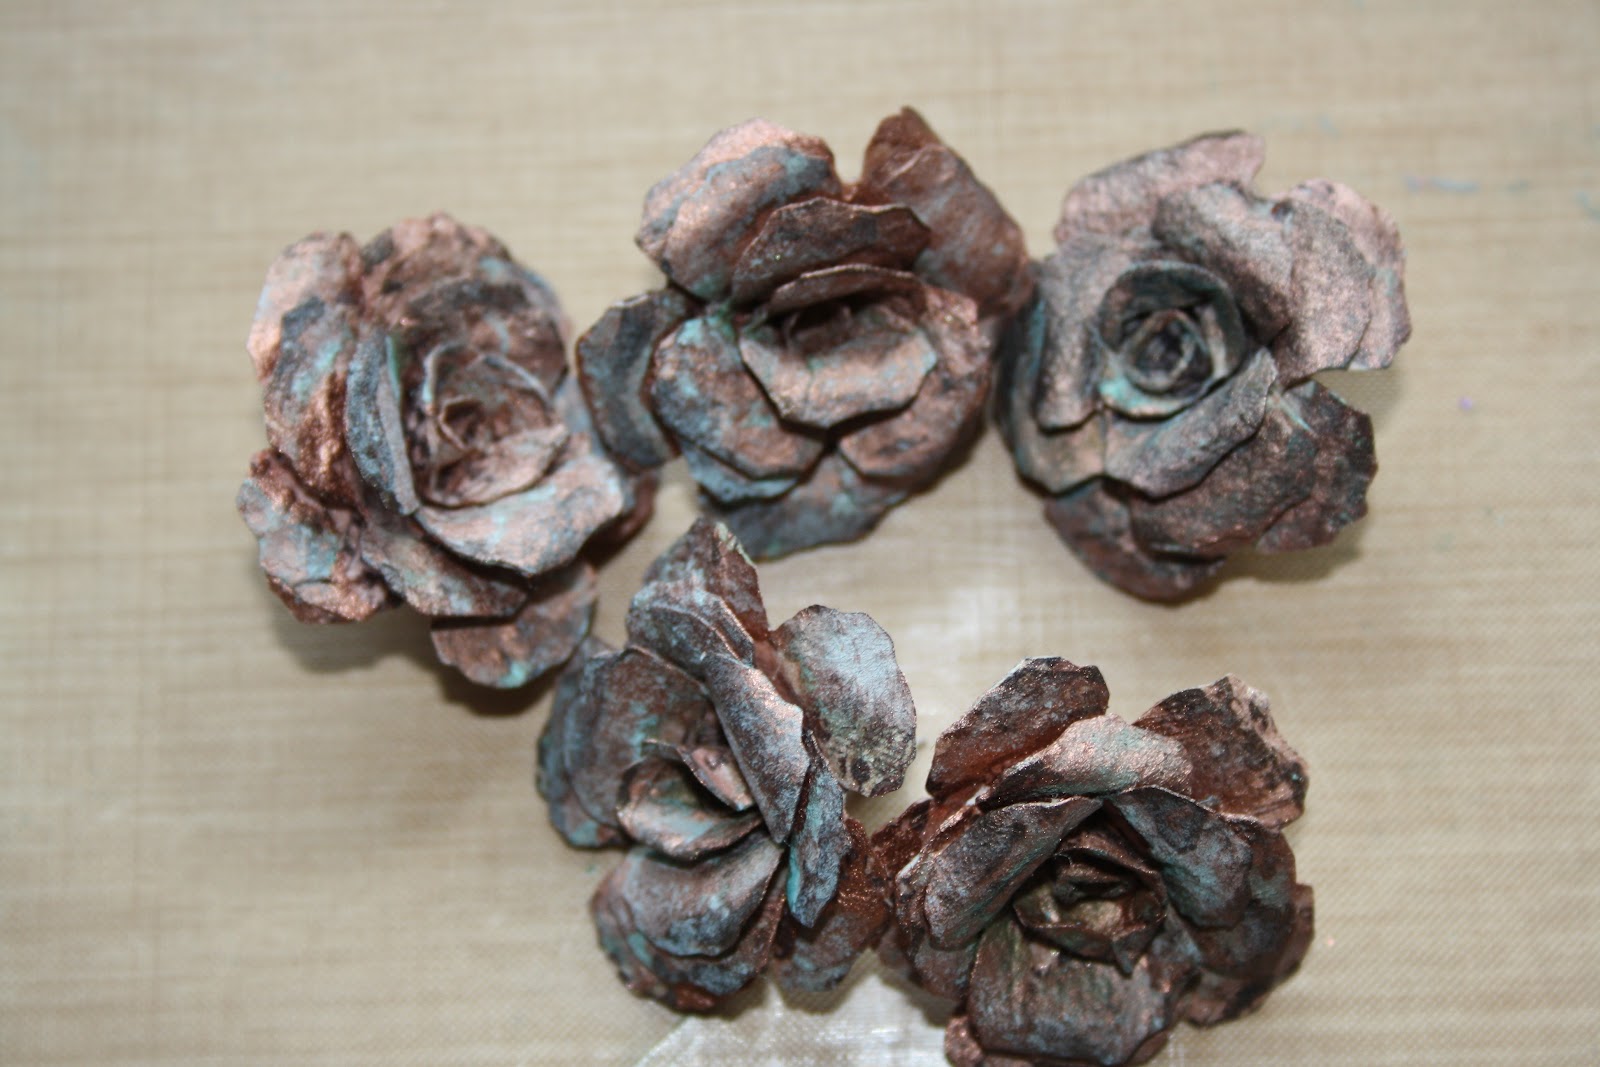
Step 5
It will dry quickly, and when it is give the petals a bit more of a roll back to define their shape. Paint the flower with the Copper verday paint. Give it two thin coats letting it touch dry between coats. Now put it to one side to dry throughly.
Step 6
Once Dry, place it on a craft mat and give it a spritz with the patina solution, a mini mister gives a nice light spray, which is all you need. Once they are thoroughly dry they will look like this and have a nice stiff feel to them. They even feel old as well as looking old.
Add anything else you want to them, distress stickles look lovely on these, or add random spots of glossy accents and add Beadazzles, Glitter or Frantage Shaved ice would add a lovely morning dew appearance to them.
Carol x
No comments:
Post a Comment